
Link to all Weeks Week 1 Week 2 Week 3 Week 4 Week 5 Week 6 Link to this Unit on MyKangan
Today’s Class
- Assessment – Website
- Four Web Pages
- Step 1 Brainstorm Ideas
- Step 2 Research Content
- Step 3 Storyboard
- Step 4 – Create the Website
- Design and Layout
- Guide to Good Web Design
- Dreamweaver
- Feedback
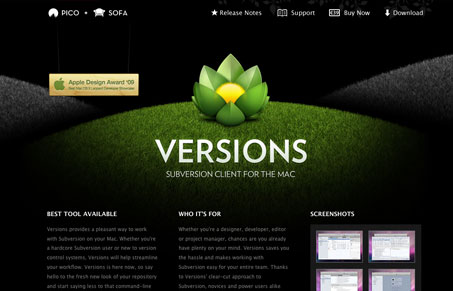
Assessment Website
Today we will commence on your assessment for this class. You will need to design a website for a client to promote his work or services. See examples below as a result of an in-class brain storm:
- Portfolio of a designer, web-designer, graphic designer, fashion designer, …
- Portfolio of an artist or illustrator
- Portfolio of a photographer
- Website for a horse trainer
- Website for a singer
- Website for a humanitarian organisation, eg Doctors Without Borders
- Website for a restaurant
Four Web Pages
You will need to create 4 web pages using Dreamweaver or a WYSIWYG (What you see is what you get) code editor. These are the pages for you to create:
- Home Page
- About us and Contact
- Gallery or Portfolio of Work
- Bookings or Purchase Requests
Step 1 – Brainstorm Ideas
Brainstorm ideas for a website (if portfolio for a photographer, what type of photographer, wedding, portrait, famous photographer, …)
Step 2 – Research Content
Go online and research what content you can find for your website. Use Creative Commons sites whenever possible:
Otherwise use Google and add Creative Commons to your search criteria.
Step 3 – Storyboard
Create a storyboard for the website. Before you can create the storyboard you will need to organise all the different elements. Please refer to the Storyboard Workshop from Tuesday:
Storyboarding for Web Designers
Webdesigners benefit from storyboarding. It helps organising content and ensures that every element is included in a logical place according to topic and site.
Read the post on Storyboarding Your Website (Source: nmasse.com).
Storyboard Template
You can use the template below (a modified version of one found on Google Docs Public Templates) :
Step 4 – Create the Website
Create the website in Dreamweaver (or any other Code editor) using HTML, CSS and if necessary JavaScript or JQuery.
Your website needs to have a well-designed layout
Attend class to learn about how to set up your website in Dreamweaver. You will learn how to create divs, place images, create an interactive menu and more.
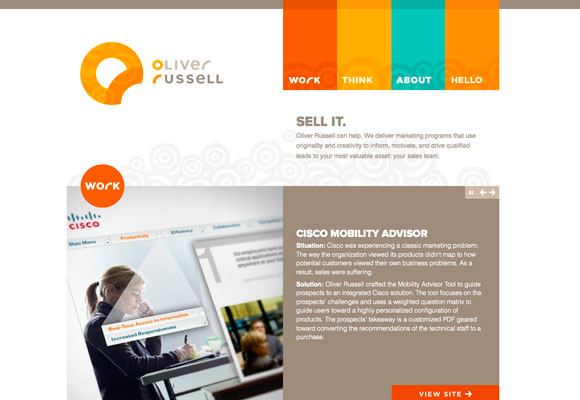
Design and Layout
Here are some important standards to consider for a convincing, well-communicated web page:
- Clarity is vital (Link to post on IWantClarity.com)
- Less items on page – make sure to use white space excessively
- Design should guide the user to information
Please view the PowerPoint show by Sara Ryan on Vic Costello’s ‘Multimedia Foundations –
Core Concepts for Digital Design’: Multimedia Foundations
Guide to Good Web Design
- Use Design to guide user’s eye to the information.
- Keep the layout simple and uncluttered.
- Use consistent navigation bar throughout the site.
- Organize text material in clearly defined groups.
- Be consistent, clear and concise.
- Stick to standards used on web (Accessibility)
- Do not include essential information on roll-over images.
- Include a contact option for the user, this could be:
- A Help Desk Number to a live person.
- A context sensitive ‘HELP’ button.
- An e-mail ‘Ask a Photographer’ or ‘Ask an Accountant’ or ‘Ask an Expert’ option.
Dreamweaver
Today you will learn how to create divs and add colour to them.
Feedback
Please leave your feedback in form of a comment. Your feedback and suggestions will help me to make this blog more user friendly. Thanks!


![The concept was used on the German side as well with this 'Auch du sollst beitreten zur Reichswehr' [You too should join the German Army], design by Julius Engelhard, Image: courtesy of mental_floss](https://classoffederico.files.wordpress.com/2014/04/world-war-propaganda_auch-du-sollst-beitreten.jpg?w=249&resize=249%2C317#038;h=317 "world war propaganda_Auch du sollst beitreten")


