Link to all Classes     Class 1     Class 2     Class 3    Class 4     Class 5     Class 6     Class 7
Photo by hotblack on morgueFile.com

Today we will look at:

  • Crop Tool
  • Image Adjustments:
    • Brightness/Contrast
    • Levels (Ctrl+L)
    • Curves (Ctrl+M)
    • Auto Tone (Shift+Ctrl+L)
    • Auto Contrast (Alt+Shift+Ctrl+L)
    • Auto Color (Shift+Ctrl+B
    • Vibrance
    • Hue/Saturation (Ctrl+U)
    • Photo Filter
    • Shadows/Highlights
  • Adjustment Layers
  • Tasks

Crop Tool

Follow the in-class instructions on how to use the Crop Tool or follow the tutorial below the image.

The crop tool works on two basic levels:

  • free-hand – simply select the crop tool (Shortcut C) [Visit Shortcutworld for more Photoshop Shortcutsand drag a window over your image. You can adjust the size of the crop selection by dragging the edges and corners. You can even rotate your crop selection (with CS4 or higher).
    Hit Enter to complete the crop action and accept the new size.
  • key in dimensions – after activating the crop tool enter the width: 500 (in px for web), the height: 600 (in px) and the resolution: 150 (72 is suitable for web)- the values need to be entered in the options bar (also called properties bar). See image below as an example. Next drag the crop window and press enter to except the change.
    Note that the window is restricted in its scale.
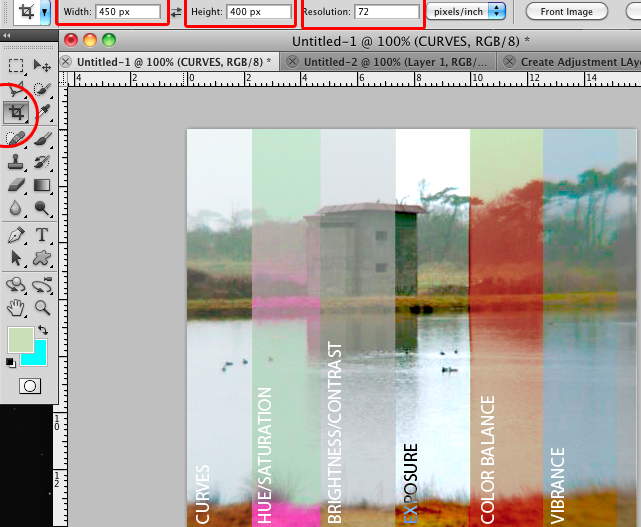
See the dimensions of the Crop Tool: 450px x 400px with 72ppi resolution.

Cropping and Straightening Images in Photoshop Essentials

Cropping Tool in Photoshop Essentials

Brightness/Contrast

Follow the in-class demonstration. A nice and basic function, it allows you to change the brightness and correct the contrast. Move the slider to change the values.

Image>Adjustments>Brightness/Contrast

Tick and untick the Preview box to observe the changes before accepting it.

Use the sliders. It is self explanatory.

Levels

With the Levels function you can adjust problems with tone (eg a photo that is very grey and does not show enough dark and light aspects) or colour related problems (eg too much blue).

The Short Cut: Ctrl+L (Cmd+L) or use: Image>Adjustments>Levels

Overview: follow my in-class introduction to how to use the Levels in simple steps. Use the attached photo by Matthew Bridges of the old house at a lake.
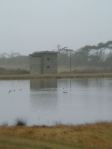
Photo by matthewbridges on morgueFile.com
Image>Adjustments>Level

The easiest and most basic way to apply the Levels function is by moving the sliders for the highlight (white) and shadows (black) below the graph of the input levels inwards. Moving the highlight will brighten the image up and moving the shadow will darken the shadows.

This is a good basic function to start of with and it is useful for the majority of your photos, may they be basic shots or more sophisticated and at higher resolution.

Follow this tutorial to learn how to use the Level Adjustment more detailed and how to create an Adjustment Layer:

Fix Tone and Color with Levels in Photoshop – Photoshop Essentials

Improving Image Tone With Levels In Photoshop – Photoshop Essentials

Curves

Follow the in-class demonstration (shortcut: Ctrl+M or: Image>Adjustments>Curves). The Curves function is similar to the Level function, but the graph is a lot more visual and intuitive. You can manipulate it with your mouse.  See image:
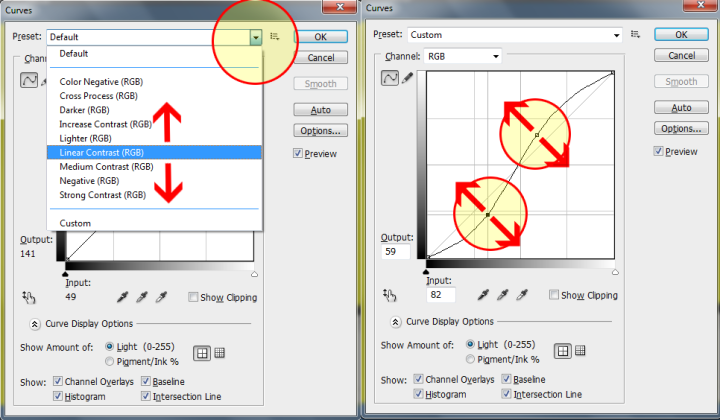
Try the presets and see how it affects your image, and then manipulate the curve yourself.

Curves Tutorial on Photoshop Essentials

Auto Tone

The short cut is Shift+Ctrl+L (or: Image>Auto Tone). Follow the in-class demonstration. The Auto Tone function readjusts tonal settings in your image and in most cases this results in a crisper image with the click of a button. The Auto Tone option looks for the darkest and lightest points in an image and resets them to pure white and black, resulting in clearer tones.

Because  Auto Tone adjusts each color channel individually, it may remove color or introduce color casts.

Auto Contrast

Follow the in-class demonstration.

The short cut is Alt+Shift+Ctrl+L  (or: Image>Auto Contrast). Auto Contrast adjusts image contrast automatically, at the click of a button. Unlike Auto Tone it will not affect colours. It clips the shadow and highlight values in an image and then maps the remaining lightest and darkest pixels in the image to pure white and pure black . As a result the image will have lighter highlights anf darker shadows and a crisper contrast.

Auto Color

Follow the in-class demonstration.

The short cut is Shift+Ctrl+B  (or: Image>Auto Color)

Auto Color adjusts the contrast and color of an image. It is able to search images for shadows, midtones, and highlights. It then neutralizes the midtones using a target color of RGB 128 grey and clips the shadow and highlight pixels by 0.5%. Personally, and from experience it effects images less and Auto Contrast and Auto Tone bring more convincing changes in image quality.

Vibrance

Follow the in-class demonstration. Click: Image>Adjustments>Vibrance

As the name suggests this function will help you making a photo look more vibrant. Colours can be shown more intensely with higher saturation. It is easy to grasp this function, simply move the sliders to the right to increase vibrance or move them to the left to decrease vibrance.

Based on a photo by delboysafa from morgueFile.com

Hue/Saturation

Follow the in-class demonstration.  (Ctrl+U or Image>Adjustments>Hue/Saturation)
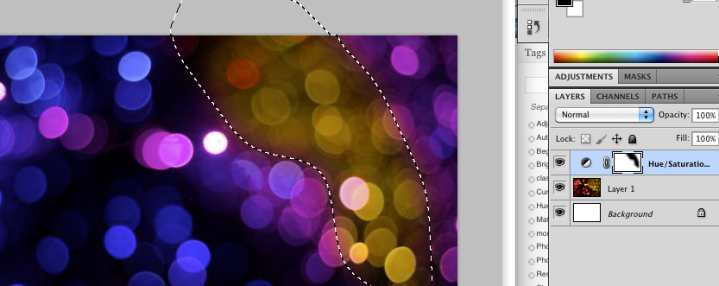
Using Hue/Saturation Adjustment Layer with a mask showing the original (yellow) below.

Photo Filter

Photo Filter
Photo Filter

Follow the in-class demonstration. Press: Image>Adjustments>Photo Filter.

One of the best image adjustment options, you can select from a set of preset filters: use a warming filter to create a lighting sense that you would encounter indoors, in autumn (fall) or during a sunset when there are more yellow, orange and red colours around. Use a cool filter to create a typical outdoor setting or a winter atmosphere. You can tick the Color box and select your own colour or select a colour from the image itself (simply click on the part of the image).

You can also change the amount of density, more density results in a stronger impact of your filter. Find a level that you like – try to be more conservative and chose a little less density than you like for a print).

Shadows/Highlights

Follow the in-class demonstration. Click: Image>Adjustments>Shadows/Highlights.

With the shadows and highlights you can easily lighten up an underexposed, dark image. Use the functions sparsely to not overdo the changes, which can easily create an unrealistic look. The image shows the changes on a dark photo.
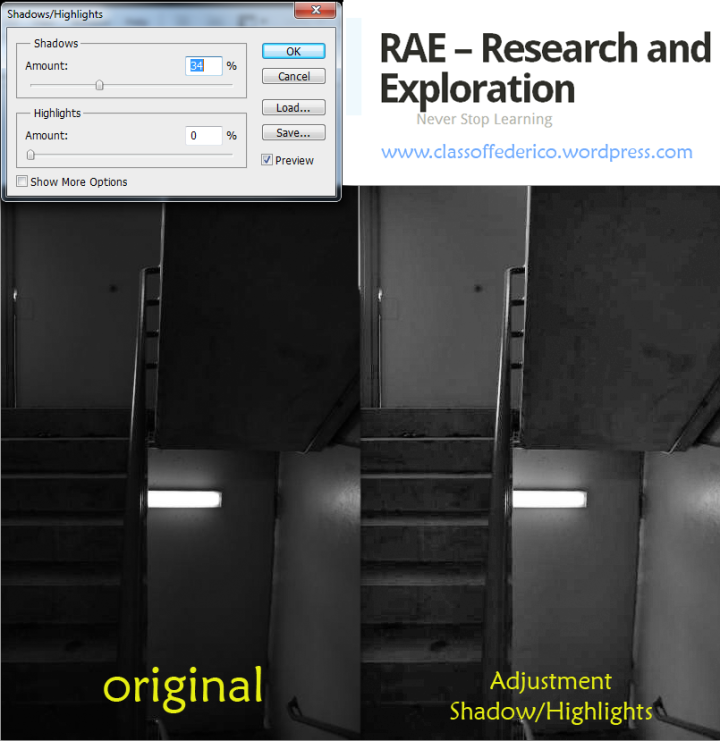
Based on photo by o0o0xmods0o0o from morgueFile.com

Use an Adjustment Layer

All the image adjustments that we have looked at above can be done directly to an image or in from of an adjustment layer. It is far better to create an adjustment layer, this allows you to create changes in form of a layer. You can always delete or hide the layer and your original image remains unaffected.

How do you create an adjustment layer?

With your original layer selected click on the Create a new fill or adjustment layer button and select what type of adjustment layer you want to create. Next do all the adjustments to it.

Alternatively you just click on the Adjustments tab and select the Adjustment Layer that you want to create.

(See image)
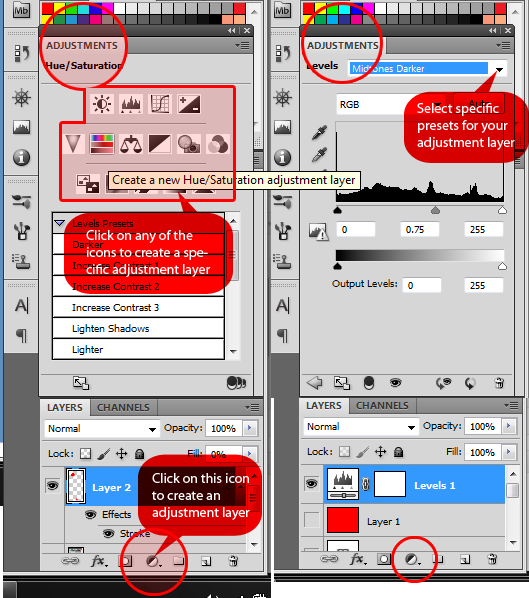
Create an Adjustment Layer

Task in Class

Perform these two tasks to show that you understood today’s class ( If you have missed this class you need to do this!!!)

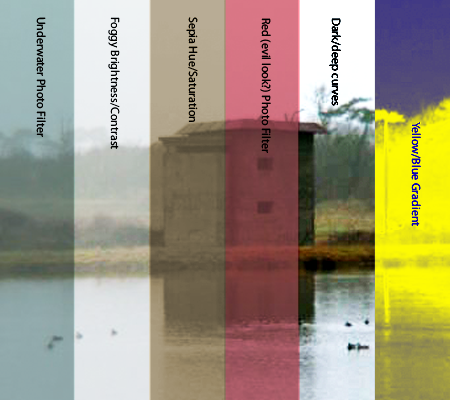
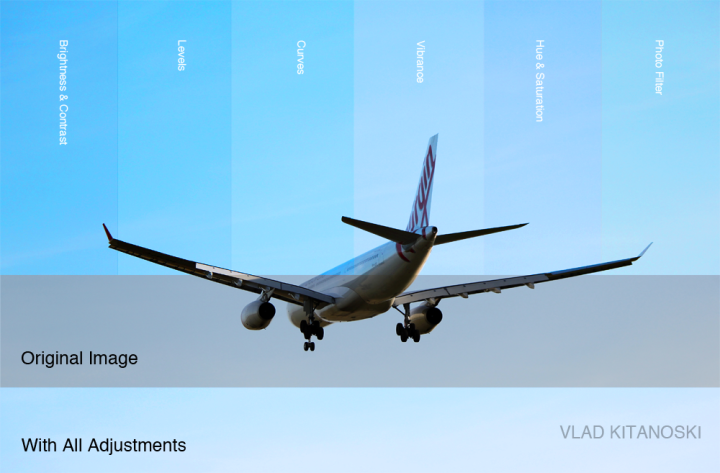
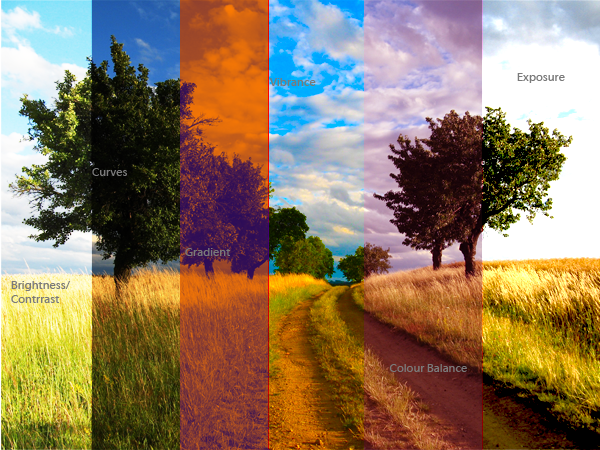
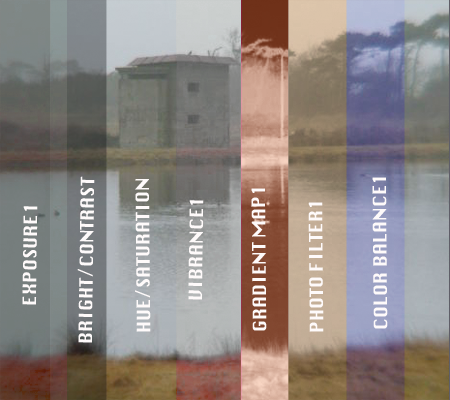
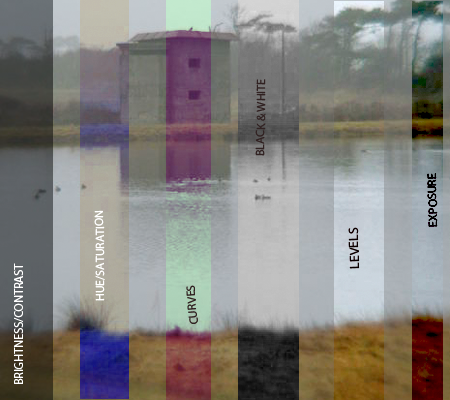
  1. Use the image by Matthew Bridges (or select an alternative image). Use the crop tool and resize to 500px x 600px at 150ppi (resolution). Apply 6 different image adjustment layers and mask them off in strips (see examples of student work). Add titles to your strips.  E-mail the file to me as a PNG (not PSD) and keep a copy for yourself.
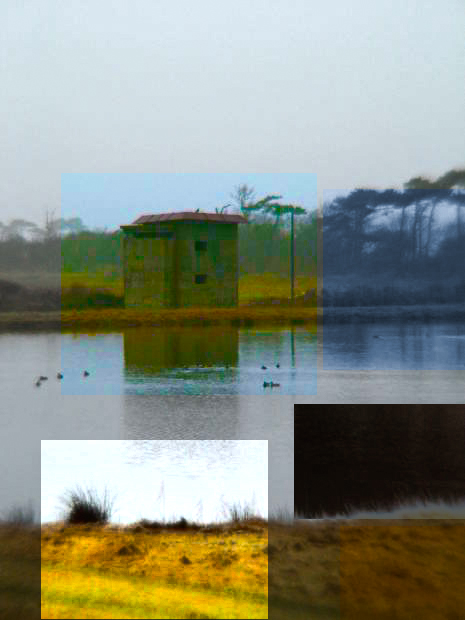
  2. In your second task I would like you to use Matthew Bridges’ image only. The photo is very grey and it looks foggy. I would like you to improve the image using any of the image adjustment functions that you have learnt about. When you are happy with the improved image e-mail me a PNG version of it (no need to crop the image).
    Create a before and after version of the image.

Student Submissions:
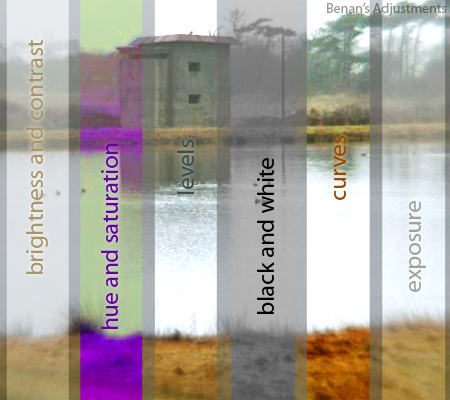
Work by Benan Ü
Work by Benan Ü
Work by Michael T
Work by Michael T
Work by Tristan S
Work by Tristan S
Work by Vlad K
Work by Vlad K
Work by Jo W
Work by Jo W
Work by Justin A
Work by Justin A

Link to Class 5     Class 4     …      Class 1

Photo by hotblack on morgueFile.com

Content for Today’s Class

  • Crop Tool
  • Image Adjustments:
    • Brightness/Contrast
    • Levels (Ctrl+L)
    • Curves (Ctrl+M)
    • Auto Tone (Shift+Ctrl+L)
    • Auto Contrast (Alt+Shift+Ctrl+L)
    • Auto Color (Shift+Ctrl+B
    • Vibrance
    • Hue/Saturation (Ctrl+U)
    • Photo Filter
    • Shadows/Highlights
  • Adjustment Layers
  • Tasks

Crop Tool

Follow the in-class instructions on how to use the Crop Tool or follow the tutorial below the image.

The crop tool works on two basic levels:

  • free-hand – simply select the crop tool (Shortcut C) [Visit Shortcutworld for more Photoshop Shortcutsand drag a window over your image. You can adjust the size of the crop selection by dragging the edges and corners. You can even rotate your crop selection (with CS4 or higher).
    Hit Enter to complete the crop action and accept the new size.
  • key in dimensions – after activating the crop tool enter the width (in px for web), the height (in px) and the resolution (72 is suitable for web)- the values need to be entered in the options bar (also called properties bar). See image below as an example. Next drag the crop window and press enter to except the change.
    Note that the window is restricted in its scale.
See the dimensions of the Crop Tool: 450px x 400px with 72ppi resolution.

Cropping and Straightening Images in Photoshop Essentials

Cropping Tool in Photoshop Essentials

Brightness/Contrast

Follow the in-class demonstration. A nice and basic function, it allows you to change the brightness and correct the contrast. Move the slider to change the values.

Tick and untick the Preview box to observe the changes before accepting it.

Use the sliders. It is self explanatory.

Levels

With the Levels function you can adjust problems with tone (eg a photo that is very grey and does not show enough dark and light aspects) or colour related problems (eg too much blue).

The Short Cut: Ctrl+L (Cmd+L)

Overview: follow my in-class introduction to how to use the Levels in simple steps. Use the attached photo by Matthew Bridges of the old house at a lake.

Photo by matthewbridges on morgueFile.com
Image>Adjustments>Level

The easiest and most basic way to apply the Levels function is by moving the sliders for the highlight (white) and shadows (black) below the graph of the input levels inwards. Moving the highlight will brighten the image up and moving the shadow will darken the shadows.

This is a good basic function to start of with and it is useful for the majority of your photos, may they be basic shots or more sophisticated and at higher resolution.

Follow this tutorial to learn how to use the Level Adjustment more detailed and how to create an Adjustment Layer:

Fix Tone and Color with Levels in Photoshop – Photoshop Essentials

Improving Image Tone With Levels In Photoshop – Photoshop Essentials

Curves

Follow the in-class demonstration (shortcut: Ctrl+M). The Curves function is similar to the Level function, but the graph is a lot more visual and intuitive. You can manipulate it with your mouse.  See image:

Try the presets and see how it affects your image, and then manipulate the curve yourself.

Curves Tutorial on Photoshop Essentials

Auto Tone

The short cut is Shift+Ctrl+L. Follow the in-class demonstration. The Auto Tone function readjusts tonal settings in your image and in most cases this results in a crisper image with the click of a button. The Auto Tone option looks for the darkest and lightest points in an image and resets them to pure white and black, resulting in clearer tones.

Because  Auto Tone adjusts each color channel individually, it may remove color or introduce color casts.

Auto Contrast

Follow the in-class demonstration.

The short cut is Alt+Shift+Ctrl+L (maybe not that short after all). Auto Contrast adjusts image contrast automatically, at the click of a button. Unlike Auto Tone it will not affect colours. It clips the shadow and highlight values in an image and then maps the remaining lightest and darkest pixels in the image to pure white and pure black . As a result the image will have lighter highlights anf darker shadows and a crisper contrast.

Auto Color

Follow the in-class demonstration.

The short cut is Shift+Ctrl+B.

Auto Color adjusts the contrast and color of an image. It is able to search images for shadows, midtones, and highlights. It then neutralizes the midtones using a target color of RGB 128 grey and clips the shadowand highlight pixels by 0.5%. Personally, and from experience it effects images less and Auto Contrast and Auto Tone bring more convincing changes in image quality.

Vibrance

Follow the in-class demonstration.

As the name suggests this function will help you making a photo look more vibrant. Colours can be shown more intensely with higher saturation. It is easy to grasp this function, simply move the sliders to the right to increase vibrance or move them to the left to decrease vibrance.

Based on a photo by delboysafa from morgueFile.com

Hue/Saturation

Follow the in-class demonstration.  (Ctrl+U)

Using Hue/Saturation Adjustment Layer with a mask showing the original (yellow) below.

Photo Filter

Photo Filter
Photo Filter

Follow the in-class demonstration. One of the best image adjustment options, you can select from a set of preset filters: use a warming filter to create a lighting sense that you would encounter indoors, in autumn (fall) or during a sunset when there are more yellow, orange and red colours around.

Use a cool filter to create a typical outdoor setting or a winter atmosphere. You can tick the Color box and select your own colour or select a colour from the image itself (simply click on the part of the image).

You can also change the amount of density, more density results in a stronger impact of your filter. Find a level that you like – try to be more conservative and chose a little less density than you like for a print).

Shadows/Highlights

Follow the in-class demonstration. With the shadows and highlights you can easily lighten up an underexposed, dark image. Use the functions sparsely to not overdo the changes, which can easily create an unrealistic look. The image shows the changes on a dark photo.

Based on photo by o0o0xmods0o0o from morgueFile.com

Use an Adjustment Layer

All the image adjustments that we have looked at above can be done directly to an image or in from of an adjustment layer. It is far better to create an adjustment layer, this allows you to create changes in form of a layer. You can always delete or hide the layer and your original image remains unaffected.

How do you create an adjustment layer?

With your original layer selected click on the Create a new fill or adjustment layer button and select what type of adjustment layer you want to create. Next do all the adjustments to it.

Alternatively you just click on the Adjustments tab and select the Adjustment Layer that you want to create.

(See image)

Create an Adjustment Layer

Task in Class

Perform these two tasks to show that you understood today’s class ( If you have missed this class you need to do this!!!)

  1. Use the image by Matthew Bridges (or select an alternative image). Use the crop tool and resize to 450px x 400px at 72ppi (resolution). Apply 6 different image adjustment layers and mask them off in strips (see examples of student work). Add titles to your strips.  E-mail the file to me as a PNG (not PSD).
  2. In your second task I would like you to use Matthew Bridges’ image only. The photo is very grey and it looks foggy. I would like you to improve the image using any of the image adjustment functions that you have learnt about. When you are happy with the improved image e-mail me a PNG version of it (no need to crop the image).

Student Submissions:

Work by Benan Ü
Work by Benan Ü
Work by Michael T
Work by Michael T
Work by Naşide S
Work by Naşide S
Work by Tristan S
Work by Tristan S
Work by Berna K
Work by Berna K
Work by Vlad K
Work by Vlad K
Work by Jo W
Work by Jo W
Work by Justin A
Work by Justin A